Tuesday, May 17, 2011
The Importance of Fat over Lean in Oil Painting
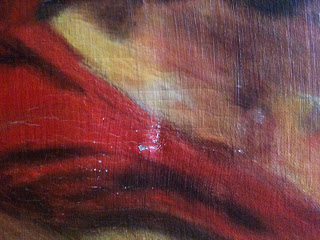
This is an image of an oil painting that I was asked to repair. It's an old palette knife and brush combo painting. I'd say just by colors, subject matter and handling it was probably done in the late 70's to early 80's. The painting was damaged by: humidity, change in temperature and poor storing. There was a large indentation that was made by something heavy leaning up against the surface of the painting. It chipped the paint and left a noticeable dimple. The problem was resolved by spraying the back with water to reactivate the sizing in the gesso. The painting tightened up but water reactivation can only work so far. I'd say if the client wanted an absolutely flat surface, then the painting should be carefully taken off of it's stretcher and it should be re-stretched over a PH balanced and prepared solid surface. Ex: A 3/4 thick piece of hardwood that is treated on all sides with gesso. This should be a wood like oak that is sturdy and will not warp easily. The pressure of the wood resting on the backside of the painting will force the painting to flatten out. Another note: This painting was done on linen. Much like linen clothes that always look wrinkled even right after you iron them, linen is so temperamental and affected by change in temperature and moisture. Linen will have more of a tendency to crack over time because it is so easily "influenced". Another note: Palette knife painting on linen in oil is really not the best decision. This is why: The action of applying paint on canvas with a palette knife pushes down on the surface of the canvas. Brushes do this too but brushes do not have a sharp, hard edges that actually scratch the surface of the painting as one applies the paint. The scratching disturbs the paint that was previously applied (the first layer that is thinned with turpentine) to the canvas potentially disturbing the fat over lean ratio. The fat over lean principle cannot be messed with. This is why most of the crackle damage happened in the first place, regardless of accidents, weather, poor storing...etc. Fat over lean has to do with the varying drying times in oil pigments. Each pigment has a specific drying time. This painting was done with earth tones and cadmiums. (Yikes!!) Earth tones generally have very short drying times. Cadmiums have very slow drying times, unless they are cheap paints that have drying mediums added to them. This is the reason why painters are taught to sketch out the first layers with small amounts of earth toned paint and a lot of turpentine. You have to slowly build up from thin layers of earth tones to thicker layers of paint. If you take a palette knife full of an earth color like umber and slap it down on the surface of a gessoed canvas and paint over that in thin layers of paint, you are going to be in crackleland for sure. If you put down a cadmium first and an umber on top of that, you or one of your relatives might be crying at a art restorer's office in a few years. If you are a painter you have to know that when you paint in oil: begin with earth tones in thin layers and build up to thicker layers of paint.
Thick paint applied with a palette knife and damage from an outside source.
Dimple and paint surface damage.
Damage from an outside source.
More scratch damage.
Fat over lean problem.
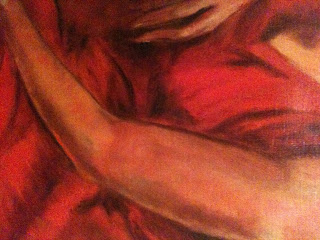
Restored painting:
All better!!! I used heavy, high pigmented paints with no medium and no turpentine to cover the crackles: Thus, respecting the fat over lean principle. ; )
Thursday, May 12, 2011
This was the lesson plan fun that was yesterday
Sarah Schrift
Summer 2007
Forth Grade Level
Huichol inspired yarn paintings
Summer 2007
Forth Grade Level
Huichol inspired yarn paintings
Objectives and Goals:
· To learn about the Huichol people of North Central Mexico
· To appreciate art from other cultures
· To understand how symbols are used in culture and in art
· To learn the technique of Huichol yarn painting and how we have adapted it to fit classroom concerns/needs
· To establish our own personal subject matter of something you love and/or believe in
Anticipatory Set (approximate time): An introduction to the Huichol culture and their yarn paintings will take about 5 minutes.
The word "Huichol" is pronounced Wettchol. The Huichol are descendents of the Aztec, the Huichol number about 18,000, most of which live in the sierra of Jalisco and Nayarit. (This will be illustrated by a map.) Having withstood the Spanish Invasion, they are still striving to keep their culture alive and viable, despite the ever increasing physical and cultural encroachment of their Mexican neighbors. Their colorful beadwork and yarn work reflects a reverent and symbiotic relationship with nature.”
(http://www.mexconnect.com/articles/190-mexico-s-huichol-resource-page-their-culture-symbolism-art) *(Images will be shown as examples of Huichol yarn paintings)
From the time they are children, they learn how to communicate with the spirit world through symbols and rituals. For the Huichol, yarn painting is much more than mere aesthetic expression. The topics of these yarn paintings reflect Huichol culture and its shamanic traditions. (Definition of Shaman: a priest or priestess who uses magic for the purpose of curing the sick, divining the hidden and controlling events.) Like icons (Definition of icon: A person or thing regarded as a representative symbol of something) they are documents of ancient wisdom.
*(Traditionally, the Huichol use beeswax to glue the yarn onto their surfaces but in this case, white glue will be used as it is safer and doesn’t require heat. )
Direct Instruction (approximate time): 2.5 minutes
The teacher will demonstrate how to start the project by quickly sketching on the canvas board to illustrate the design plan. The teacher will explain the choice of subject matter and how it relates to something that is loved or believed in and the reasons behind specific color choices. The teacher will then proceed to dip a length of yarn at a time (the yarn must be coated entirely with glue) into the glue and place it directly onto the board. The yarn will follow the sketched design in alternating colors. The process will be repeated. The teacher will warn the students to be careful not to move the glue covered yarn that has already been placed on the canvas. The wet yarn can be easily disturbed but will dry in place after a few hours. Pieces of glue covered yarn will be placed all over the canvas until it is completely covered .
Guided Practice (approximate time): Guidance at the beginning of the project will take about 2.5 minutes.
The students will then begin their projects as the teacher walks around the classroom to help them as it is needed. Most concerns will be over the subject of their design and the handling of the medium.
Independent Practice (approximate time): 18-20 minutes.
Students will complete their projects and will be urged to cover all of the white of the canvas. Surprisingly, as the yarn is thick and the students have just a small area to cover, most will finish in 20 minutes or less.
Required Materials and Equipment:
· 8” x 10” prepared canvas boards
· A gallon of white Elmer’s Glue
· Paper plates or plastic bowls for distributing the glue
· Multi-colored balls of thick yarn
· Scissors for all of the students
· Newspaper to cover the tables
· Pencils
· Erasers
· Pencil sharpeners
· A drying table (the canvas boards will be placed here so they can dry over night)
· A nearby sink with soap for gluey hands
Assessment and Follow-Up: Will be discussed as the students are finishing up with their projects. This will take 1-2 minutes.
· How have we used symbols in our yarn paintings to express the things that we love or believe in?
· How have we used colors to convey the meaning behind these symbols?
Thursday, April 21, 2011
Critique
As I expose my art and my thoughts in what to me is a new format, I remember how critique can be positive as well as negative. When I was in undergrad, I had a critique with someone who essentially told me that I was showing off in my paintings, that I relied too much on my skill of painting the figure and that I should try to paint without including the figure. I took this to heart and for five years following this critique I excluded the figure from my work. For these five years I felt absolutely lost in my painting. I did not feel like I was coming into my own again until I returned to painting the figure. Now I am much more careful about whom I ask to critique my work and how much I let the advice of others affect my work. The Commandments below are an intention I am setting for myself as I move forward.
Ten Commandments of Critique
(Giving the Critique)
1) Thou shalt not give a critique unless you are specifically asked to.
2) Thou shalt begin with what is working before you talk about what is not working.
3) Thou shalt do your best to try to understand where the artist is coming from and where they want to go with their art before you make suggestions.
4) Thou shalt not try to change the artist’s style or concept just for the sake of making it more like your own artwork or your own esthetic.
5) Thou shalt try your best to build the artist up as opposed to knock the artist down.
(Both Giving and Receiving the Critique)
6) Thou shalt be tactful.
(Receiving the Critique)
7) Thou shalt ask for a critique only from a person whose opinion you respect and who’s esthetic you admire.
8) Thou shalt ask for a critique only when you feel the work is done and can stand on its own.
9) Thou shalt respect the critic’s opinion but know in your heart that it is just an opinion or a suggestion not a command.
10) Thou shalt acknowledge that a critique is not a debate.
Tuesday, April 19, 2011
To Paint
Turpentine and linseed
The way to scent a room
And mixing up a palette
The skin of bones and ruin
I’ll settle in the hours
This thing I’ve learned to see
It calls me in a way
I have to make it be
-Sarah Schrift
Subscribe to:
Posts (Atom)